
Multiple Texture UV Mapping in Blender for Unreal 4
That is quite a mouth full for a title but it is important for creating a large and efficient environment.The current trend with texture mapping is to create 1 material per object. This allows you to do some very cool things with tools like Substance Designer. If you have a lot of objects, that is going to be a lot of textures in memory.
I am building a game that will have expansive landscapes / scenes. I need to be very performance conscious from the outset. This includes reusing textures and mapping multiple textures onto one object when necessary. This will allow me to have fewer textures in memory.
I am a bit rusty with Blender but it is coming back to me.
Here is a simple example of creating a cube with collision and 2 texture UV mappings. I can view the object in blender with the textures and in Unreal with the textures once imported.
STEP 1: Setting up Blender (One time setup)
Unreal has a different object scale than blender. We need to adjust blender to build objects to Unreal's scale. Set scale to 0.010

We also need change the view clip so it doesn't freak out with unusually large scaled objects:

Make sure the end value is 500m not 500mm.
I scaled up the default cube so it looked normal size.
STEP 2: Collision Mesh
I copied the cube, slightly enlarged the copy, renamed the copy to UCX_{object name}_{number}. I also changed the UCX to be wireframe. Note: You can have as many collision meshes for an object. Each collision mesh must start with UCX_{object name}.

Step 3: Add Materials
I used to do UV mapping without adding materials in blender. This worked for UDK. This does not work for Unreal...
Select your object and add a material:
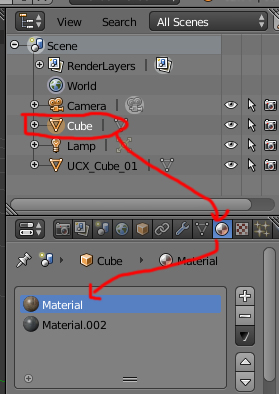
With the material selected, click on the texture tab and load the texture:

Repeat this process for the second material/texture.
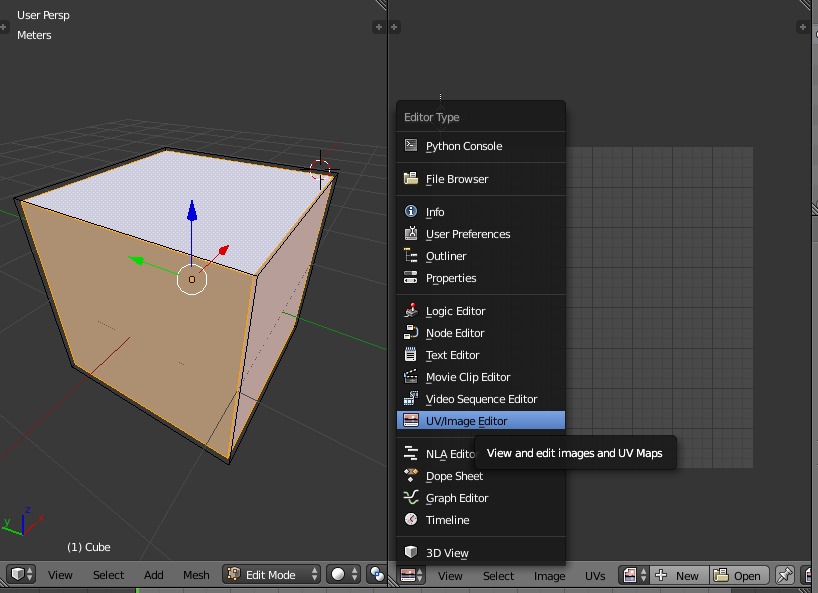
Step 4: UV Mapping
Before we do UV mapping, lets make sure the object will display the textures from the UV editor in the 3D View:

Now we need to UV map onto the material and simultaneously a texture with the UV editor.
Lets split the 3D view to include the "UV/Image Editor":
Select the cube, go into edit mode, be in face select mode, select 3 of the 6 faces (3 for 1 texture and 3 eventually for the other), press U for unwrap and select "Smart UV Project". Now open the texture in the UV mapping for the 3 sides:

Now to complete the mapping we need to assign it to the material:

Repeat this for the other 3 faces. In the end you will have an object that looks like the one in the 3D view above.
Step 5: Import into Unreal
Now export this to FBX. Don't adjust any settings.
Open Unreal and import the FBX. If everything went well, you will have a properly scaled object with collision and 2 texture materials mapped to it:

This will drop right into the level and works.
The end goal is to not load the textures/materials into Unreal since they should already exist. But for a quick Proof of Concept, this worked surprisingly well.
My only complaint is I have to make sure I have the textures selected in the UV editor or it won't display correctly in the 3D View. It will render, but that isn't very helpful when building/adjust the object.
No comments:
Post a Comment